2023. 2. 13. 02:09ㆍ공부 중/Node.js
WEB2 - Node.js - 생활코딩
수업소개 이 수업은 JavaScript를 이용해서 Node.js를 제어해 동적으로 HTML 코드를 생성하는 웹애플리케이션을 만드는 방법에 대한 수업입니다. 수업대상 예를들어 1억개의 페이지로 이루어진 웹사
opentutorials.org
생활코딩 node.js 강의 정리
1. 글 수정하기
CRUD에서 U를 담당하는 update 기능을 구현해 보자.
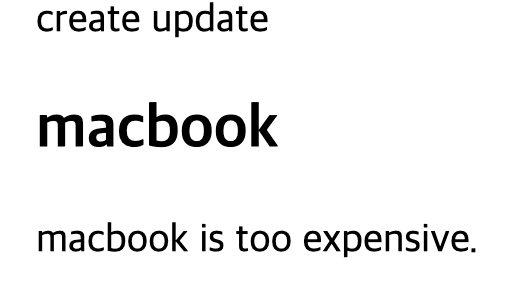
가. 링크 만들기
<a href="/update?id=${title}">update</a>지금 보고 있는 파일의 이름을 id로 전달한다.
update 링크는 특정한 글을 읽고 있는 중에만 보여야 한다.
function templateHTML(title, list, description){
  return `
              ...
        <div id="article">
          <a href="/create">create</a>
          <h2>${title}</h2>
          ${description}
                ...
  `;
}
create link가 위치한 곳 옆에 update link를 위치시키는데 오직 특정한 글을 읽고 있는 경우에만 보이도록 해야 한다.
function templateHTML(title, list, control, description){
...
                <div id="article">
          ${control}
          <h2>${title}</h2>
          ${description}
...
이를 위해서 templateHTML 함수에 create와 update를 담을 control이라는 매개변수를 새로 만든다.
변경된 함수에 맞게 코드를 수정한다.
if (pathname === "/") {
    if (queryData.id === undefined) {

          ...
        let control = `
          <a href="/create">create</a>
        `;
        template = templateHTML(title, list, control, description);
              ...

    } else {

              ...
          let control = `
            <a href="/create">create</a>
            <a href="/update?id=${title}">update</a>
          `;
          template = templateHTML(title, list, control, description);
            ...

  } else if (pathname === '/create'){
          ...
      let control = ``;
      template = templateHTML(title, list, control, description);
        ...
각각의 경우에 맞는 control를 전달한다.
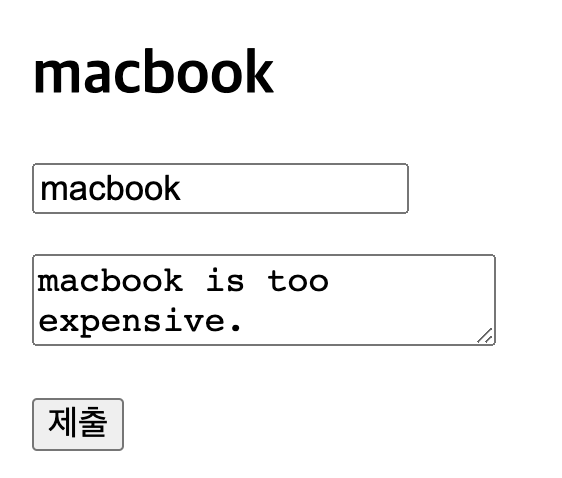
나. UI 만들기
우선 수정할 대상이 되는 글의 내용을 수정할 수 있는 form에 넣어서 화면에 보여주어야 한다.
} else if (pathname === '/update'){
    fs.readdir('./data', function(err, filelist){
      let title = "update";
      let udateForm = `
        <form action="http://localhost:3000/update_process" method="post">
            <p><input type="text" name="title" placeholder="title"></p>
            <p>
                <textarea name="description" placeholder="description"></textarea>
            </p>
            <p>
                <input type="submit">
            </p>
        </form>
      `;
      let list = templateList(filelist);
      let control = ``;
      template = templateHTML(title, list, control, updateForm);
      response.writeHead(200);
      response.end(template);
    });
  } else {
여기서 기존의 내용을 읽어와서 form을 채워 넣는다.
} else if (pathname === '/update'){
    fs.readFile(`./data/${queryData.id}`, 'utf8', function(err, description){
    fs.readdir('./data', function(err, filelist){
      let title = queryData.id;
      let updateForm = `
        <form action="http://localhost:3000/update_process" method="post">
            <p><input type="text" name="title" placeholder="title" value="${title}"></p>
            <p>
                <textarea name="description" placeholder="description">${description}</textarea>
            </p>
            <p>
                <input type="submit">
            </p>
        </form>
      `;
      let list = templateList(filelist);
      let control = ``;
      template = templateHTML(title, list, control, updateForm);
      response.writeHead(200);
      response.end(template);
       });
    });
} else {- fs.readFile(`./data/${queryData.id}`, 'utf-8', function(){...}
: 수정할 파일의 내용을 읽어오기 <input type="text" name="title" placeholder="title value=${title}">
: 읽어온title을 입력<textarea name="description" placeholder="description">${description}</textarea>
: 읽어온description입력
다. 버그 해결
지금 이 방식에는 문제가 있다.
만약 제목을 수정해서 전달하면 이전에 쓰던 제목을 모른다.
그렇기에 눈에 보이진 않지만 이전에 쓰던 제목을 기억하고 있는 무언가가 필요하다.
<input type="hidden" name="id" value="${title}">input tag의 타입을 hidden으로 설정하면 보이진 않지만 이전의 제목을 기억하고 있도록 할 수 있다.
데이터를 전송할 때 기억하고 있는 이전 제목의 값도 같이 보내도록 한다.
} else if (pathname === '/update'){
    fs.readFile(`./data/${queryData.id}`, 'utf8', function(err, description){
    fs.readdir('./data', function(err, filelist){
      let title = queryData.id;
      let updateForm = `
        <form action="http://localhost:3000/update_process" method="post">
                    <p>
                        <input type="hidden" name="id" value="${title}">
                <input type="text" name="title" placeholder="title" value="${title}">
                    </p>
            <p>
                <textarea name="description" placeholder="description">${description}</textarea>
            </p>
            <p>
                <input type="submit">
            </p>
        </form>
      `;
      let list = templateList(filelist);
      let control = ``;
      template = templateHTML(title, list, control, updateForm);
      response.writeHead(200);
      response.end(template);
       });
    });
 } else {
라. 파일 수정해서 저장하기
/update_process로 전달한 데이터 받아서 파일 수정하기.
}else if(pathname === '/update_process'){
   let body = '';
   request.on('data', function(data){ body += data;});
   request.on('end', function(){
    let post = qs.parse(body);
    let id = post.id;
    let title = post.title;
    let description = post.description;
    console.log(post);
        ...
//출력
22:56:17 0|main | [Object: null prototype] {
22:56:17 0|main | id: 'haha',
22:56:17 0|main | title: 'haha??',
22:56:17 0|main | description: 'hoho??'
22:56:17 0|main | }일단 post에 다 집어넣었다.
id: 수정 전 titletitle: 수정 후 tiltedescription: 수정된 본문
이 것을 바탕으로 기존의 파일을 수정해 보자.
- 기존의 파일에 접근한다.
- 파일의 이름을 변경한다.
- 파일의 내용을 변경한다.
// file 이름 바꾸는 방법
fs.rename(oldPath, newPath, callback)
fs.renameSync(oldPath, newPath)
} else if (pathname === "/update_process") {
let body = "";
request.on("data", function (data) {
body += data;
});
request.on("end", function () {
let post = qs.parse(body);
let id = post.id;
let title = post.title;
let description = post.description;
fs.rename(`./data/${id}`, `./data/${title}`, function (err) {
fs.writeFile(`data/${title}`, description, "utf8", function (err) {
response.writeHead(302, { Location: `/?id=${title}` });
response.end();
});
});
});
} else {이름 바꾸고 내용 바꾸고 리다이렉션까지 한다.
 |
 |
 |
|---|
전체 모습.

'공부 중 > Node.js' 카테고리의 다른 글
| 2023-02-18 node.js_16 (0) | 2023.02.18 |
|---|---|
| 2023-02-13 node.js_15 (0) | 2023.02.13 |
| 2023-02-12 node.js_13 (0) | 2023.02.12 |
| 2023-02-12 node.js_12 (0) | 2023.02.12 |
| 2023-02-11 node.js_11 (0) | 2023.02.11 |